Our quality products and best service will make your business much better.
Professional . Specialized . Experienced
(English)
17
Dec
In the Direct-to-Film (DTF) industry, few things are as frustrating as a printer that refuses to cooperate with its media. Whether your printer is "spitting out" the film immediately or completely refusing to grab the sheet, you are dealing with a common mechanical challenge.
While it may feel like a software glitch or a firmware error, film feeding issues are almost always physical. This guide breaks down why these errors happen and provides professional, field-tested solutions to get your production back on track.
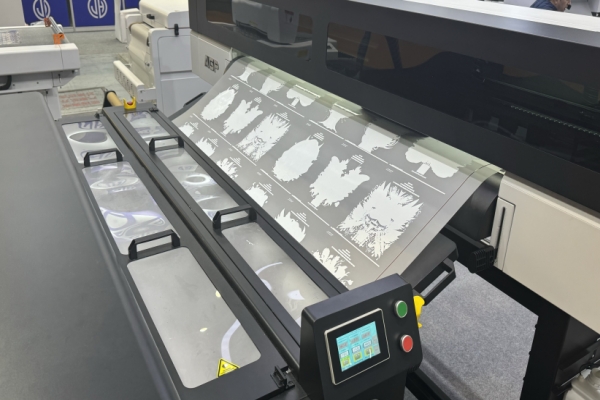
The paper feed mechanism in most inkjet-based DTF printers relies on two primary components: a top rubber pickup roller and a bottom retard roller.
These rollers rely on friction to move the film. DTF film presents a unique challenge because it is coated with a matte, silicon-based release agent. Over time, this "powder" transfers to the rubber rollers, making them slippery. Additionally, brand-new rollers may have hardened rubber that hasn't yet developed the necessary "grip."
If your printer ejects the film or shows a "Paper Out" error, do not restart your computer or clear your AcroRIP queue.
The "Retry" Method: Simply re-align the film and press the Paper Feed button on the printer.
Persistence: Sometimes it takes 3–5 attempts for the rollers to find enough "bite" on the film. Repeating this process is safer and faster than restarting your hardware or software.
The most effective way to solve feeding issues is to restore the friction of the rubber wheels using isopropyl (rubbing) alcohol.
Trigger an Error: Send a small print job to the printer without any film loaded. The printer will attempt to feed, fail, and trigger a "Paper Out" light.
Apply Solvent: Dampen a lint-free kitchen towel or microfiber cloth with rubbing alcohol.
Clean the Top Wheel: Press the Paper Feed button. As the top rubber wheel rotates to look for paper, hold your alcohol-dampened cloth firmly against it. Let the wheel spin against the cloth to scrub off accumulated silicon dust and grime.
Clean the Bottom Wheel: Manually rotate the bottom wheel with your finger while scrubbing it with the cloth. Ensure you clean the entire circumference.
Once your rollers are clean, follow these operational best practices to prevent future jams:
The "Gap" Rule: When placing film against the backrest, do not wedge it too tightly against the side guides. Leave a small gap (1-2mm) on the left side. If the guide is too tight, the film will warp or "buckle," causing the sensor to misread the edge.
The Paper Support Trick: Grab a stack of standard 80gsm office paper and place it sideways in the feeder behind your DTF film. This provides a rigid "spine" for the film, helping it stay upright and flat as the rollers grab it.
Pre-Feeding Prep: Run your fingers along the bottom edge of the DTF film sheet before inserting it. This removes excess loose powder that would otherwise immediately coat your clean rollers.
Edge Modification: For particularly stubborn films, apply a small strip of masking tape to the bottom right corner (the side the sensor reads).3 This creates a high-friction "leading edge" that the rollers can grab easily.
If cleaning fails and the rollers are simply too worn or smooth to function, there are two final options:
The Hairspray Method: This is a "quick fix" for aging rollers. While the wheel is spinning, lightly spray a small amount of tacky hairspray onto the rubber. Allow it to dry for 20 minutes. This creates a temporary high-grip surface. Caution: Use this sparingly, as over-spraying can gunk up internal sensors.
Roller Replacement: If the rubber has become "glazed" or cracked, it is time to replace the pickup roller assembly. While the parts are inexpensive, the installation often requires significant disassembly of the printer casing.
DTF feeding issues are a rite of passage for every print shop owner. By maintaining a schedule of cleaning your rollers with alcohol and using the "paper support" method, you can eliminate 90% of your downtime.


