

Our quality products and best service will make your business much better.
Professional . Specialized . Experienced
(English)

24
Mar
White ink failure is the single most common complaint among DTF printer owners. Unlike CMYK inks, DTF white ink is a heavily pigmented ink with titanium dioxide particles that constantly settle out of suspension. That sediment is the root of most white ink problems. In practice, however, failures trace back to seven distinct causes: a clogged print head, ink path and circulation failures, white ink density problems, wrong RIP settings, and environmental humidity, plus two extended issues (film coating and powder shaking timing) that appear as white ink defects even when the printer itself is running normally.
This guide breaks down all seven causes one by one, then gives you a symptom, cause and fix table, a step-by-step troubleshooting flow, a preventive maintenance schedule, and answers to the five questions we hear most often.
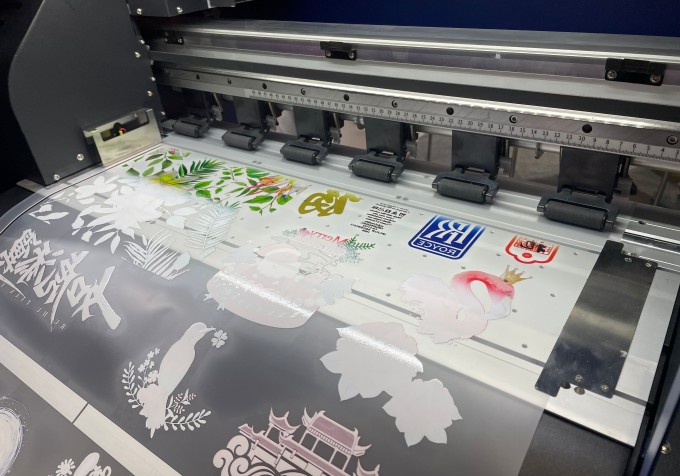
The print head is where everything ends up, so it is where most white ink failures show up first. Dried white ink, pigment sediment and foreign particles build up inside the nozzles until white simply stops coming out.
Symptoms: The nozzle test shows missing channels in the white pattern, white output is absent, broken or striped, and the problem usually appears after the printer has sat idle for a few days.
How to fix it, in three levels from softest to hardest:
Run the automatic cleaning programs: clean ink first, then load ink (strong flushing). Repeat two or three times. Many clogs dissolve at this stage and never go further.
If software cleaning fails, seal the nozzle surface together with the capping station pad, then soak the area in warm water at around 40 to 50 degrees Celsius. Let the dried ink soften, then run the clean ink program again and print a nozzle test to verify the result.
If soaking still does not solve it, inject cleaning solution into the nozzle with a syringe, draw the dissolved impurities back out, and finish with a software cleaning cycle. If this fails too, move to parts troubleshooting:
Check whether ink is actually reaching the head.
Check the damper for damage.
Check whether the capping pad seals properly.
Rule out a completely dead print head.
A special case worth remembering: if white ink prints normally, then suddenly turns faint, improves after cleaning, then weakens again in a repeating cycle, the internal filter inside the print head itself is clogged. Cleaning will not fix this. The print head needs to be replaced.
Also check the electronics. A head that receives no signal behaves exactly like a clogged one. Inspect the print head cable for wear, liquid ingress or burn marks, and make sure it is firmly seated on the carriage board. If the cable was connected in reverse during installation, the head may already be burned, so always follow the connection guide step by step.
White ink is a paint-type pigment ink. It separates and settles constantly, all the way from the ink bottle to the nozzle. That is why the whole ink path, including bottles, tubes, dampers, filters, shunt device and pumps, must be designed and maintained with the particularity of white ink in mind. This is the main source of all white ink problems.
What usually goes wrong:
Damper problems. Air trapped in the damper breaks the ink supply. Suck the air out with a syringe. If the damper is full of sediment, replace it rather than trying to save it.
Clogged white ink filter. The filter catches the particles that would otherwise block the head. When it saturates, white flow drops to nothing.
Leaking, broken or bent ink tubes. Any kink or crack introduces air and starves the head.
Failed stirring and circulation pumps. If the stirring motor or circulation pump stops working, ink sits still and sediment forms in the tubes and dampers within days.
Ink loading failure. If ink will not load at all, check two points. First, whether the ink tube under the capping station is loose. Second, whether the nozzle and capping station are sealed well when the carriage returns to its home position, and adjust the position until it is completely sealed.
For a brand-new printer, verify the whole path before printing:
Make sure the ink tank has enough ink (at least two thirds full) and that its vent cap is slightly loose rather than airtight.
Check tubes and dampers for leaks, breaks or bends.
Check that the ink in each path is in good condition and that the shunt device holds enough ink. A white ink shunt buffer device, standard on TEXTEK machines, keeps ink supply smoother.
Tip: Do not print immediately after filling a newly installed printer. Wait about 10 minutes until stirring and circulation have fully worked and the shunt device holds enough ink, then start printing.
Even with a perfect ink path, white ink that has been left to settle will not print properly. Settled ink reaches the head as a thick, under-mixed paste. It clogs nozzles, prints faint or grayish white, and accelerates wear on dampers and filters. Two habits cause most density-related failures.
The printer has been stored or left idle, and the stirring system and circulation function were not turned on during startup. Ink activity drops, sediment accumulates, and white prints very light. Always confirm that the stirring system and circulation are running before every job, especially after any shutdown.
Ink was refilled without being fully stirred first. Before pouring white ink into the tank, shake and stir it thoroughly so it enters the system with full activity. Never top up with ink straight from a bottle that has been sitting on a shelf for weeks.
Daily routine: Shake the ink bottles before any printing or maintenance session. It is a simple step that prevents a large share of white ink problems, and many printers on the market now include automatic bottle stirring for exactly this reason.
Ink quality matters too. If white was printing well and suddenly fails, check whether the ink is the same brand and batch as before, and whether it is past its expiration date. Aged or low-cost white ink settles faster and clogs sooner.
Sometimes the hardware is perfectly fine. The white head and the color head both pass nozzle tests, but white still does not appear in the printout. In that case the problem is in the file, not in the machine.
Check the spot color channel in the design software first. In Photoshop or similar software, confirm that the white layer exists as a proper spot color channel, with the correct spot color name that your RIP recognizes.
Then check the RIP software settings. Different RIPs handle white channel setup differently, and Maintop, RIPrint, Photoprint and CADlink each have their own workflow. Verify that the white channel is enabled, mapped to the white head, and set to the correct ink density. If you are unsure about your specific RIP, contact your printer supplier for a walkthrough.
Note: This cause is easy to overlook because every hardware test looks healthy. A quick spot color channel check should always come before any disassembly.
White ink is far more sensitive to the environment than CMYK inks. The recommended operating environment for a DTF printer is 20 to 35 degrees Celsius and 40 to 75 percent relative humidity.
Too dry, below 40 percent RH: Moisture evaporates from the nozzle surface, dried ink crusts form quickly, and clogging follows.
Too humid, above 75 percent RH: Condensation forms on the head and film, ink viscosity shifts, printed whites look washed out, and the powder absorbs moisture and clumps.
Too cold: White ink viscosity rises sharply, pigment suspends poorly, and sedimentation speeds up.
Keep the workshop within range year-round, using a humidifier in dry climates and a dehumidifier with sealed storage for film and powder in wet seasons.
Even when white ink prints normally on the head side, the result on the PET film can look patchy, gray or uneven, and the cause is often the film rather than the ink.
What to check:
Coating quality and batch. DTF film has a special coating that receives the ink. A bad or expired batch absorbs white poorly and the print looks faint even though the nozzle test is perfect. Switch to a fresh roll and compare.
Coating side printed correctly. Printing on the uncoated side makes ink bead up and white look broken.
Film moisture. Film stored in a humid environment absorbs moisture, which changes how the white layer spreads. Keep rolls sealed and dry.
Print head height and film flatness. If the head is too far from the film, white droplets scatter and coverage thins out.
Rule of thumb: If white looks weak only on the film but the nozzle test is solid, test a different film roll before touching the machine.
The powder step happens after printing, so it cannot stop white ink from leaving the printer. Wrong powder timing, however, destroys the white layer that has already printed, which is why it shows up in the same complaint list.
What goes wrong:
Powdering too late. Hot-melt powder must be applied while the white ink is still wet. If the printed film sits too long before shaking, the powder no longer bonds evenly and the white layer ends up thin, speckled or non-uniform after curing.
Powdering too early, before the color layer has settled. Excess powder on top of the pattern can bury fine white details.
Environmental humidity affecting powder. In humid conditions powder clumps and applies unevenly, leaving bald spots in the white.
The fix: Shake powder immediately after printing, keep the powder dry, and use a machine with an automatic powder shaker and powder recovery so that timing and coverage stay consistent.
| Symptom | Most likely cause | Fix |
|---|---|---|
| No white at all in the nozzle test | Clogged head or no signal to the head | Clean ink, then soak, then syringe flush; check head cable and carriage board connection |
| Nozzle test OK, but no white in the print | RIP or spot color settings | Check the spot color channel in Photoshop and the white channel setup in the RIP |
| White prints, then fades, then recovers after cleaning, and repeats | Internal filter in the head is clogged | Replace the print head |
| White very light or grayish | Ink settled; stirring or circulation off; ink not stirred before filling | Run stirring and circulation; stir ink fully before refilling; check ink expiry date |
| White faint only on the film | Film coating problem | Change the film roll; print on the coated side; check head height |
| White output stops suddenly after long normal use | Clogged head, aged ink, or ink path fault | Nozzle test, then check ink quality and expiry, then check the path including tubes, damper and filter |
| Ink will not load | Loose tube under the capping station; carriage not sealed | Re-seat the tube; adjust the carriage and capping seal |
| White broken or striped after idle days | Sediment in the path; dried nozzles | Full cleaning cycle; stir and circulate before printing |
| Powder does not stick evenly to the white | Powder shaking too late; clumped powder | Shake immediately after printing; keep powder dry; use an automatic powder shaker |
Follow this order. It moves from free and fast checks to expensive ones.
Step 1: Print a nozzle test. Is white missing on the test pattern? If yes, go to step 2. If white is present on the test but missing in the actual print, go to step 5.
Step 2: Software clean. Run clean ink, then load ink, two or three times, and re-test. If not fixed, go to step 3.
Step 3: Manual soak. Seal the nozzle with the capping pad, soak in warm water, then clean again. If not fixed, go to step 4.
Step 4: Syringe flush. Flush the nozzle with cleaning solution, extract the residue, then run a software clean again. If there is still no white, check the head cable and carriage board, the damper and the capping seal, then consider head replacement. A weak-then-faint cycle points to a clogged internal head filter, which means replacing the head.
Step 5: Check the file. Verify the spot color layer and name in Photoshop, and confirm the white channel is enabled and mapped correctly in the RIP, whether Maintop, RIPrint, Photoprint or CADlink.
Step 6: Check the ink system. Is stirring and circulation running? Was the ink stirred before filling? Is the ink within its shelf life? Is the tank at least two thirds full with a loose vent cap?
Step 7: Check the path. Look for leaks or bends in the tubes, air or sediment in the dampers, the condition of the white ink filter, pump operation, and whether the carriage seals on the capping station.
Step 8: Check the environment. Confirm 20 to 35 degrees Celsius and 40 to 75 percent relative humidity.
Step 9: Check the film and powder. If white is weak only on the film, swap the film roll, confirm the coated side, and review powder timing.
| Frequency | Task |
|---|---|
| Every print day, at start-up | Confirm the stirring system and circulation are on; shake the ink bottles; print a nozzle test before production |
| Before every refill | Stir the white ink thoroughly before pouring it into the tank |
| Daily | Keep the workshop at 20 to 35 degrees Celsius and 40 to 75 percent RH; keep film and powder sealed |
| Weekly | Clean the capping station and wiper; check the ink tank level and the vent cap |
| Every 3 months | Replace the white ink filter and the dampers together |
| Every 3 months | Inspect the tubes for aging, leaks and bends; check pump function |
| Before any shutdown | Run circulation, then flush and cap the head properly; on restart, allow about 10 minutes of stirring and circulation before printing |
White DTF ink carries a heavy load of titanium dioxide pigment. Those particles are denser than the liquid and constantly settle out, so white ink must stay in motion while CMYK inks can sit for days. That is exactly why stirring and timed circulation systems exist, and why white ink needs filter and damper replacement every 3 months.
No. Do not disassemble anything. When the test is clean but the output is not, the fault is almost always in the file. Check the spot color channel and name in Photoshop, then check the white channel mapping and settings in your RIP software.
This repeating cycle is the classic signature of a clogged internal filter inside the print head itself. External cleaning only clears the surface nozzles temporarily. The head needs to be replaced.
Check three common setup mistakes. First, printing immediately after filling, when you should wait about 10 minutes so that stirring, circulation and the shunt device are fully primed. Second, an ink tank vent cap that is screwed tight, when it should be slightly loose. Third, a head cable seated incorrectly, since a reversed connection can burn the head.
Short idle periods are fine if the stirring and circulation system runs on schedule, as most modern machines cycle automatically. Before the next job, always confirm that stirring and circulation are active, run a nozzle test, and expect to run a cleaning cycle. For shutdowns longer than a week, flush the white ink path or arrange for the machine to be powered on periodically so that circulation keeps running.
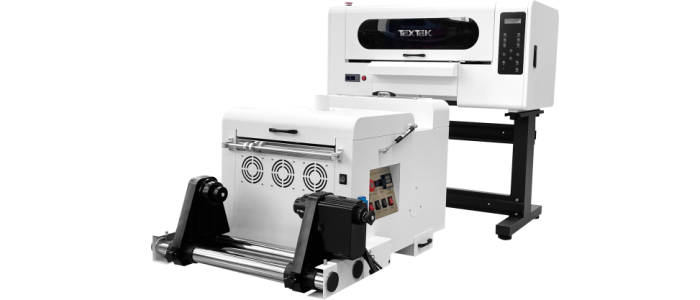
Our 60cm DTF printer adopts an Epson original print head and Hoson board, equipped with a white ink stirring circulation system and timing cycle function. It currently supports 2, 3 or 4 head configurations with high printing accuracy, and printed garment patterns can be washed. The self-developed new powder shaker realizes automatic powder recovery, saves labor costs, is easy to use, and improves work efficiency.
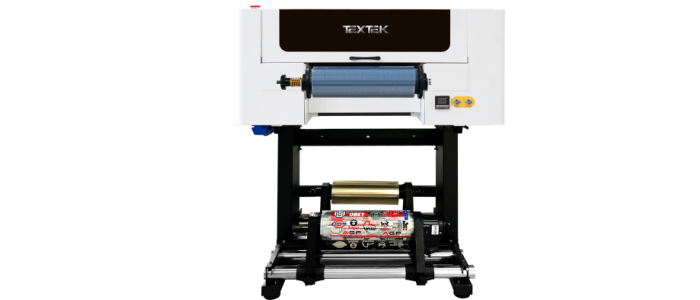
Our 30cm DTF printing machine features a stylish and simple appearance with a stable, sturdy frame, and is also equipped with a white ink stirring circulation system and timing cycle function. With 2 Epson XP600 nozzles handling color and white output, plus optional fluorescent inks for bright, high-precision results, it offers powerful performance in a small footprint, with one-stop printing, powder shaking and pressing at low cost and high return.
TEXTEK's business covers many countries around the world, including emerging and mature markets. With a complete sales system, we are committed to using our professional knowledge and first-class service to help customers grow their digital printing business.


